How to Measure French Doors for a Perfect Fit
July 5, 2026
Valances for the Kitchen: A Luxurious Design Guide for 2026
July 7, 2026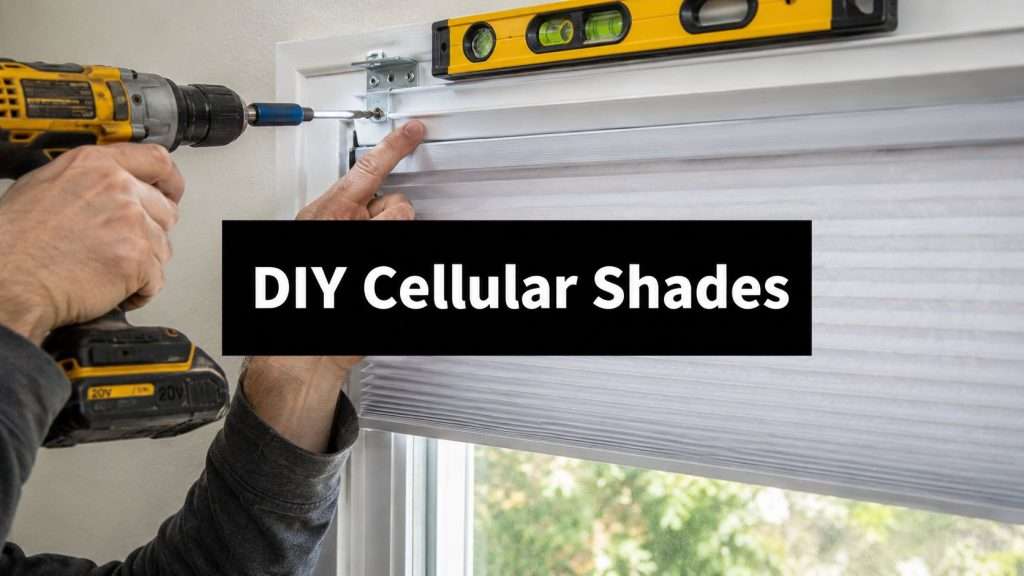
You've unpacked the shade, laid out the brackets, and held the headrail up to the window once already just to see how the room will feel when everything is finished. That moment is exciting. It's also where many installations go slightly off course.
Cellular shades are forgiving in appearance and surprisingly exacting in installation. A shade can look almost right and still operate poorly, sit unevenly, or lose the crisp, precise look that made you choose it in the first place. The difference between a quick DIY result and a polished, architectural finish usually comes down to a few small decisions made early.
A well-installed cellular shade should feel quiet, balanced, and effortless. It should rise cleanly, stack neatly, and align with the window as if it was always meant to be there. If you're learning how to install cellular shades for a refined result, the details below are the ones that matter most.
An Elegant Beginning To Your Window Transformation
A new set of cellular shades often arrives at the very end of a larger design effort. The paint is done. The furnishings are in. Maybe the drapery panels are already hanging, or maybe you're deciding whether the room needs a soft fabric layer after the shades go in. This final step matters more than people expect because the eye notices alignment immediately.
In high-end homes, the window treatment has to do two jobs at once. It has to disappear into the architecture when open, and it has to look deliberate when closed. Cellular shades do this beautifully, but only if the installation respects the proportions of the opening.
I've seen the same pattern for years. A homeowner chooses a handsome fabric, a clean cordless system, and the right color for the room, then rushes the mounting. The shade works, but it doesn't feel finished. The lines drift. The rail sits slightly proud. The whole effect loses polish.
That's why installation deserves the same care as selection.
A flawless shade doesn't call attention to the hardware. It lets the window, the light, and the room carry the luxury.
Cellular shades also earn their place with performance, not just appearance. Proper placement supports insulation and light control, which is one reason many homeowners start their search with practical concerns before they focus on style. If energy savings are part of your priority list, this overview of best blinds for energy efficiency gives useful context for why cellular shades remain such a strong choice.
The work ahead isn't difficult. It just rewards patience, precise marks, and a professional standard of finish.
Preparation For A Perfect Installation
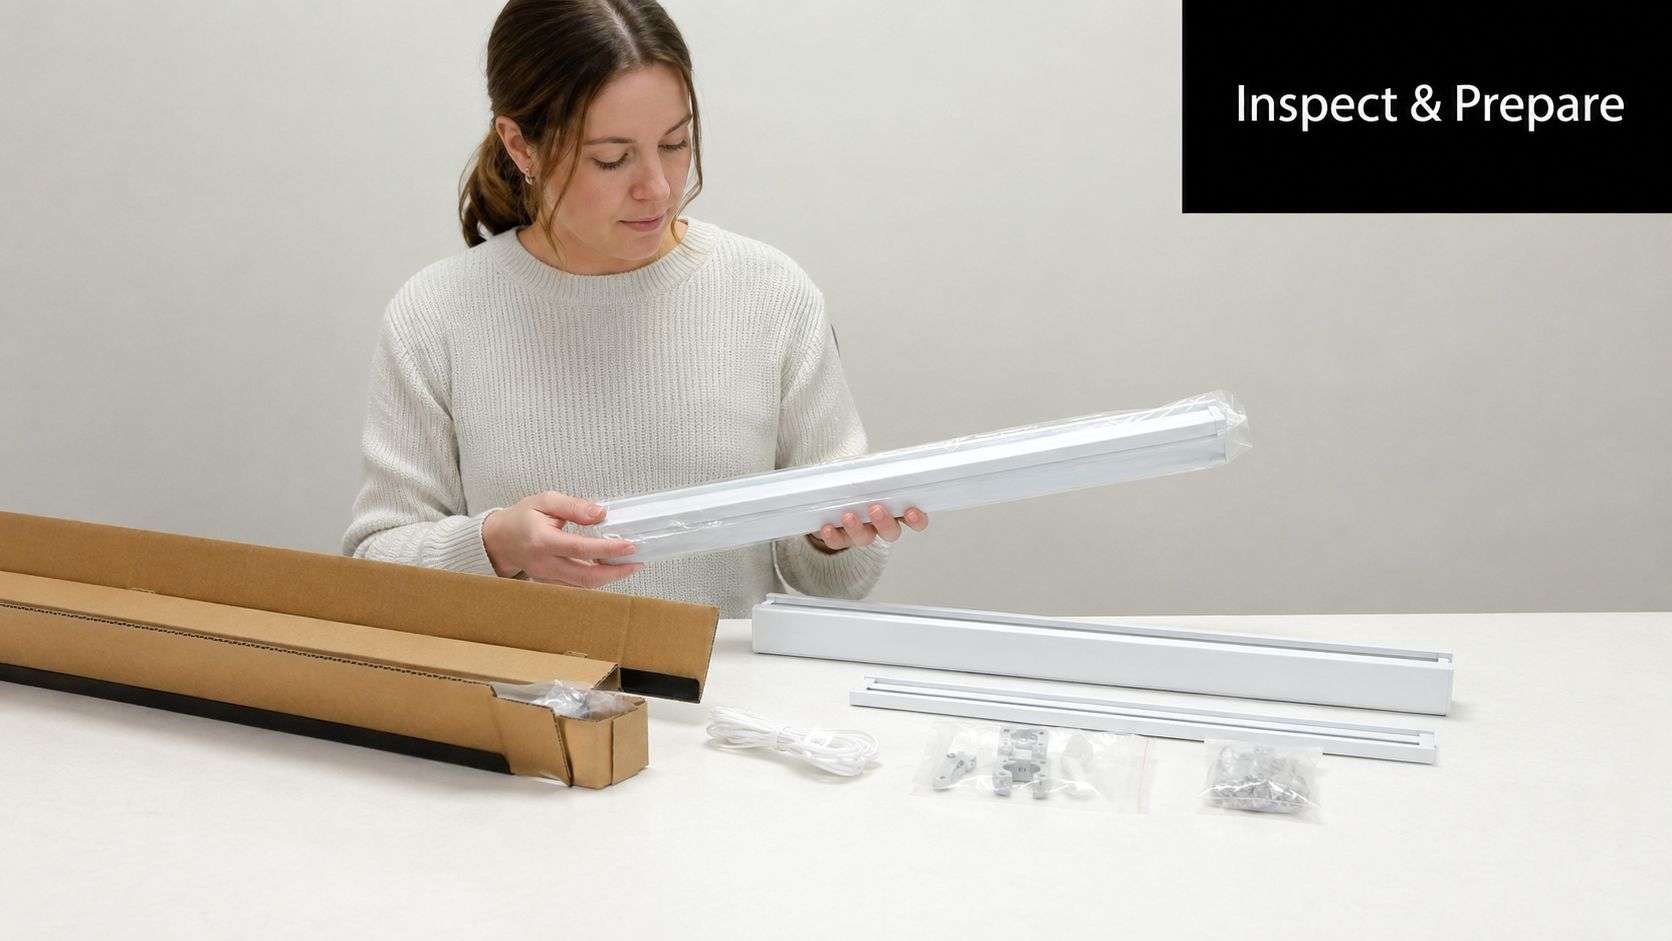
The best installations are calm before they start. Open every carton, confirm every part, and study the window before a drill comes out. That sounds basic, but it's where expensive-looking work begins.
In the Tampa Bay area, cellular shades have become much more common. Their adoption has grown by 65% since 2015, driven largely by their ability to meet energy efficiency codes that demand significant reductions in HVAC load. That growth has made one thing clear in both homes and commercial interiors: people want a clean look, but they also expect the shade to perform.
Inspect The Shade Before You Touch The Window
Lay out the headrail, brackets, screws, handle if included, battery wand if motorized, and any printed instructions from the manufacturer. Then compare the width of the unit to the opening.
A few minutes here can save a lot of rework. Check for these points first:
- Confirm The Mount Type: Inside mount and outside mount are not visually interchangeable. Inside mount looks built-in and custom-fit. Outside mount can hide trim flaws, add apparent height, and cover a wider light gap.
- Review The Hardware Count: Wider shades often include additional brackets. If your box includes more than two, don't assume they're extras.
- Check Surface Conditions: Drywall, wood trim, tile returns, and deep sills each change how the hardware should seat.
If you're still unsure whether your field measurements are right, this guide to accurate tape measure techniques is worth reviewing before you drill.
Assemble The Right Tools
Good tools don't just make the job easier. They make the finish cleaner.
Use a tape measure with clear markings, a sharp pencil, a drill with correctly sized bits, a hand screwdriver for final tightening, and a level. A laser level is especially useful on banks of windows or in rooms where ceiling lines and trim aren't perfectly true. That happens more often than people think, especially in remodels.
If you're updating several surfaces in the same space, ceiling condition can influence how the finished window wall reads. Homeowners planning broader room improvements often benefit from a practical resource like this homeowner's guide to ceiling upgrades, because trim, ceiling plane, and window treatments should feel resolved together.
Preparation Standard: Don't measure only the shade. Measure the opening, the depth, the trim, and the surrounding sightlines.
Decide What “Finished” Should Look Like
Craftsmanship begins to differentiate from mere assembly. In a formal living room, you may want the headrail to sit discreetly so the fabric reads first. In a kitchen or bathroom, function may outweigh concealment. In a bedroom, you might pair the shade later with drapery panels, outdoor drapery at adjacent lanai doors, or even coordinate future curtain repair or drapery repair work elsewhere in the home so the treatment language stays consistent.
Preparation isn't glamorous. It is, however, what keeps the installation crisp.
Mounting The Brackets With Precision
Bracket placement is where most cellular shade installations are won or lost. A shade can only operate as well as the line established by its hardware. If the brackets are off, the headrail tells on you immediately.
For inside mounts, the most reliable rule is exact and worth respecting.
For inside-mount cellular shades, brackets should sit 1.5 to 2.5 inches from each side of the window opening along the top. Data cited by Blinds.com installation guidance also notes that 78% of installation failures stem from improper bracket depth clearance.
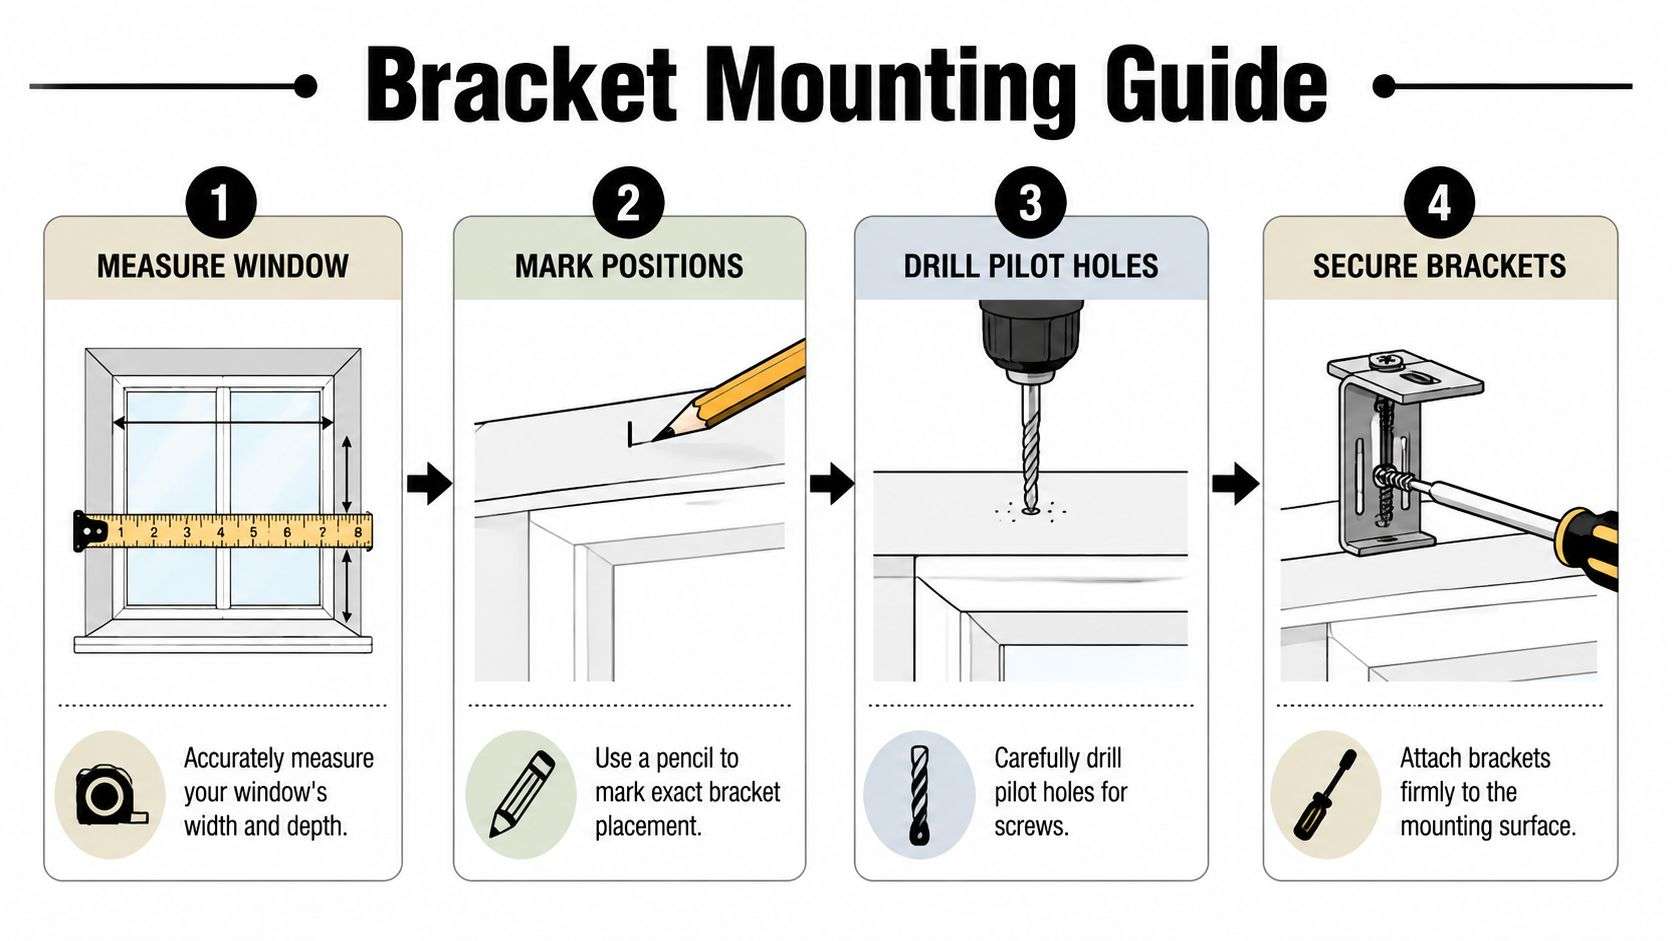
Inside Mount Placement
Start by marking the left and right bracket positions on the top of the window opening. Keep those marks consistent from the face of the frame. If the opening has enough depth, the bracket placement must also respect the shade's folding action, not just the width.
This is the nuance many quick guides miss. The bracket must sit far enough back so the headrail doesn't bind and the fabric stack can move freely. If your window has a deep return, double-check the bracket depth before driving screws.
Use this sequence:
- Mark both outside brackets.
- Set a level or laser line across the top.
- Mark pilot hole locations through the bracket.
- Pre-drill.
- Fasten each bracket without overtightening.
For wider shades, install the center or intermediate brackets evenly between the outer brackets. They support the headrail and help prevent sagging over time.
Outside Mount Symmetry
Outside mounts are less about recess depth and more about composition. The headrail should look centered to the window and deliberate in relation to the trim, wall, and drapery if the room includes layered treatments.
Visual rule: On an outside mount, your eye forgives very little. Even a slight drift off center will show once the shade is lowered.
Mark the full width first, then place the brackets just inside those end marks. If the wall surface is flush and clean, keep your screw line consistent across both sides. Outside mounts often look simple, but they expose asymmetry faster than inside mounts do.
Homeowners handling adjacent window details at the same time sometimes find it helpful to review related tasks such as install window screens like a pro, because screens, shades, and trim all compete for the same tolerances around the opening.
What Works And What Doesn't
A few trade-offs are worth stating plainly.
- What Works: Pre-drilling keeps screws straight and reduces the chance of bracket twist.
- What Doesn't: Forcing a screw into hardwood or old trim without a pilot hole often shifts the bracket just enough to affect the snap-in fit.
- What Works: Checking both bracket alignment and setback before tightening the final screw.
- What Doesn't: Assuming the window frame is square. Many aren't.
If you're comparing mount styles across products, a guide on inside mount roller shades can help sharpen your eye for how recess depth and clean sightlines affect the finished look across different shade types.
The bracket phase should feel measured, not rushed. Once these are right, the rest of the installation becomes much simpler.
Hanging And Securing The Headrail
This is the moment most homeowners look forward to. The hardware disappears, the shade takes shape, and the room starts to feel complete.
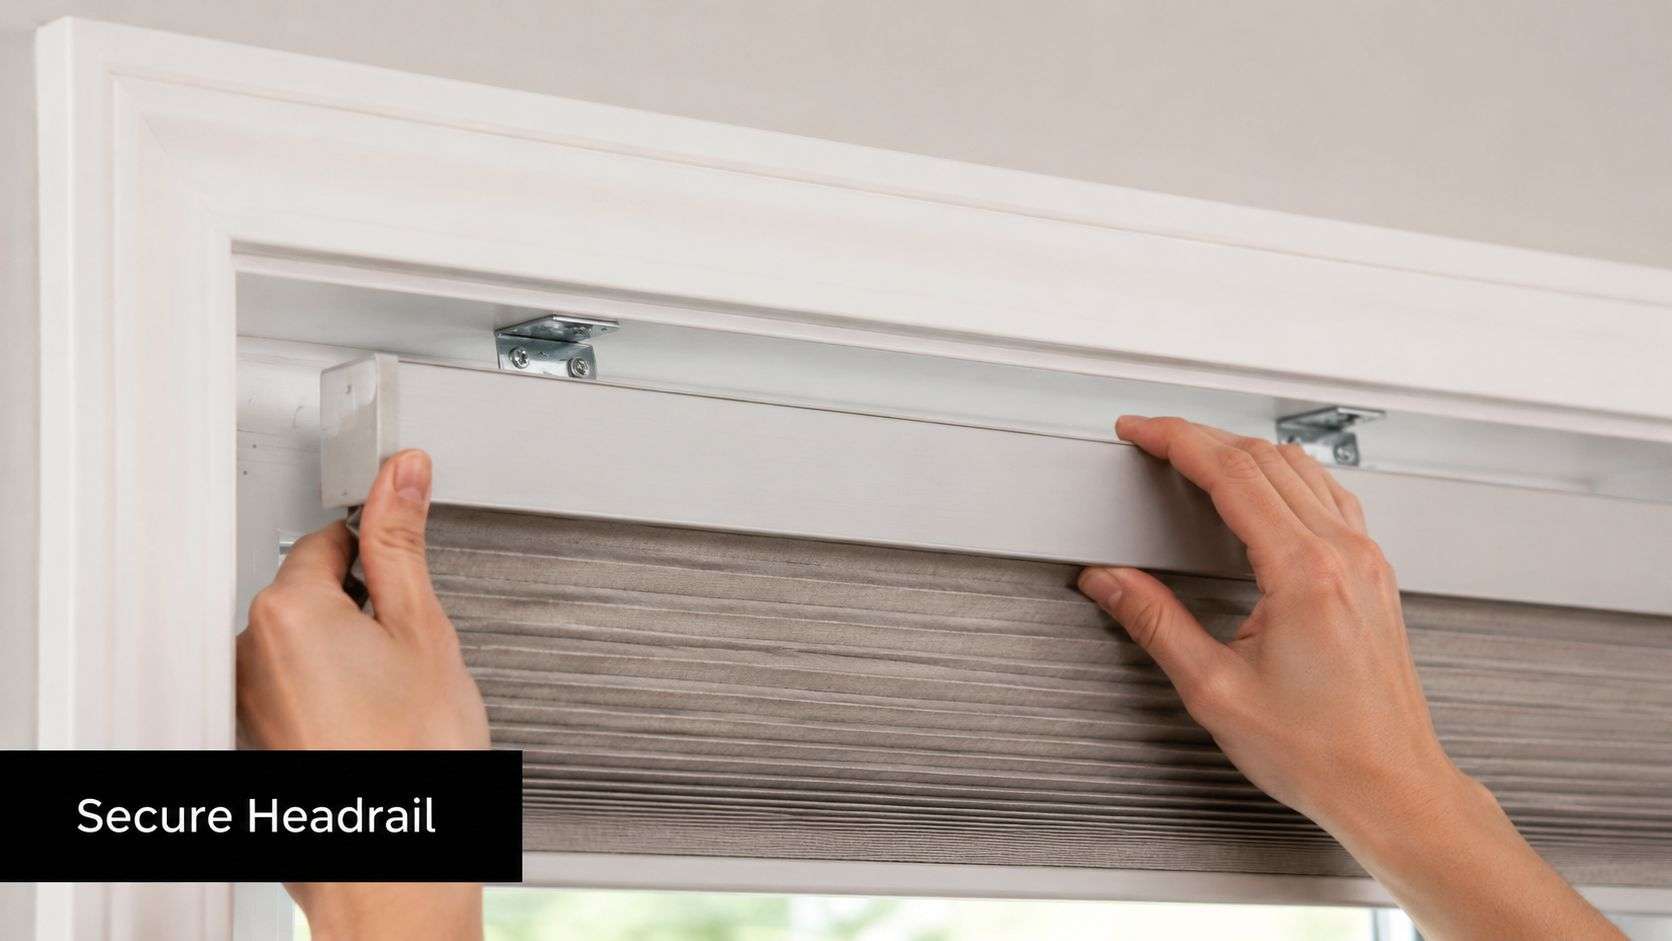
Hold the headrail with the front edge oriented correctly for the room side. On most cellular shades, you'll hook the front lip of the headrail into the bracket first, then rotate the back upward and inward until it clicks into place. That click matters. It tells you the rail is seated, not merely resting.
Seat The Rail Completely
Don't push from one end only. Support the rail near each bracket and work across evenly. If the shade spans a wider opening with multiple brackets, make sure every bracket engages before testing the lift.
A headrail that looks attached but hasn't snapped fully into one bracket can create a slight twist. That twist shows up later as uneven stacking or a shade that won't travel smoothly.
If you want a clearer sense of how the major parts align during installation, this overview of parts of a roller shade is useful because many of the same hardware principles apply even though the operating system differs.
Cordless, Corded, And Motorized Differences
Cordless shades are usually the simplest once mounted. If your product includes a clear or color-matched handle, clip it onto the bottom rail or the designated lift point. That small detail makes daily operation more comfortable and helps preserve the fabric by keeping hands off the cells.
Corded models require a final look at cord path and safety hardware. Make sure cords move freely and that any safety devices are installed where they won't interfere with trim or furniture placement.
Motorized models need more patience at the start. After the headrail snaps into place by rotating down and in until it clicks, motorized cellular shades should receive a full initial battery charge of about 6 hours per battery before extensive use. That charging routine entered the category with the rollout of motorized cellular shade systems in 2018 and is one of those small setup steps that improves early performance.
A short visual reference can help if you want to compare your hand position and rail angle during installation:
Final Attachment Check
Before you call it done, stand back and look at three things:
- The Reveal: Is the spacing visually even side to side?
- The Rail Line: Does the headrail sit level with the top of the opening?
- The Bottom Rail: When lowered partway, does it hang parallel to the sill?
This is also the stage where layered interiors come into focus. A room with cellular shades might later include decorative side panels, curtain hemming to refine an existing installation, or drapery hemming to bring older textiles back into scale with a renovated space. In covered exterior rooms, outdoor drapery can frame nearby openings and extend the same polished language beyond the glass.
Fine-Tuning And Troubleshooting Common Issues
It's common to assume a shade that doesn't lift right after installation was mounted incorrectly. That's not always true. In many cases, the fix is simple and takes a few seconds.
If a cordless shade fails to lift after installation, gently pull the bottom rail down 2 to 3 inches to re-engage the internal spring. According to this YouTube installation reference, that step resolves 90% of post-installation non-lifting issues.
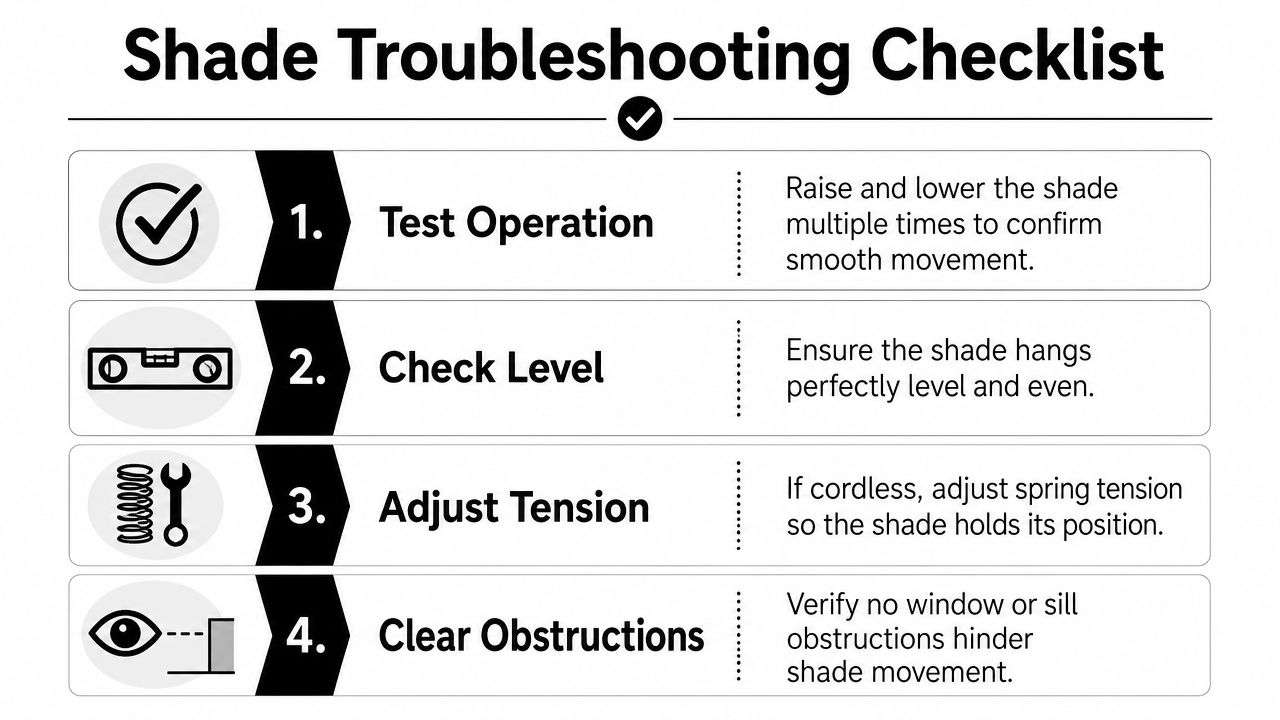
Start With Motion, Not Assumptions
Raise and lower the shade slowly several times. Don't yank it. Don't judge it on a single movement. You're looking for consistency, not speed.
If the shade hesitates, tilts, or stops unevenly, work through the likely causes in order:
- Check The Headrail Fit: Make sure every bracket is fully engaged.
- Look At The Level: A bracket line that's slightly out of level can create a visible lean.
- Inspect For Obstructions: Window locks, crank handles, projecting trim, and deep stools can interfere with travel.
A shade that hangs crooked usually points back to bracket alignment or incomplete snap-in seating, not a defective fabric panel.
Common Problems That Have Simple Fixes
The most frequent issue is the cordless mechanism needing reactivation. The second is a rail that's almost, but not fully, locked into the bracket. The third is visual imbalance caused by rushed measuring.
When the bottom rail appears off, lower the shade fully and study the top first. Homeowners often focus on the fabric because that's what they see moving, but the correction usually belongs at the hardware.
A practical troubleshooting rhythm works well:
- Operate the shade gently.
- Re-seat the headrail if needed.
- Verify bracket line and screw tightness.
- Re-test at multiple heights.
When To Stop Adjusting
There's a point where more fiddling makes the installation worse. If the brackets are level, the rail is fully seated, and the spring is re-engaged, stop making tiny corrections unless you can identify a specific problem.
That restraint is part of professional finish work. The goal isn't constant adjustment. The goal is clean alignment and dependable movement.
This is also a useful mindset in adjacent textile work. Curtain repair, drapery repair, and curtain or drapery hemming follow the same principle. Precise correction helps. Endless tweaking usually doesn't.
Maintenance And Professional Expertise
Once the shade is in and operating properly, maintenance is uncomplicated. Regular light dusting keeps the cells crisp, and a vacuum with a soft brush attachment handles most routine buildup without stressing the fabric.
If your windows collect salt, pollen, or outdoor residue, keep the surrounding frame clean too. Homeowners dealing with aluminum frames may appreciate Auckland Window and Door Services' cleaning tips, especially because dirty frames can transfer debris to the edges of the shade over time.
Where Care Makes The Biggest Difference
The most important habit is gentle operation. Don't tug a cordless rail from one corner. Don't force a motorized shade through a low battery condition. Don't let dust compact into the pleats for months at a time.
Cordless systems have become the preferred choice for many families for good reason. The introduction of cordless lift handles in 2017 enabled 98% of residential users to operate shades without cords, and that shift improved child safety compliance in Florida from 70% to 95% by 2022.
When Professional Installation Is The Better Decision
Some windows shouldn't be treated as a casual weekend project. Oversized spans, tall stairwells, specialty shapes, and integrated motorization all benefit from experienced hands. Commercial spaces raise the stakes further because alignment has to hold across repeated windows, shared sightlines, and heavier use.
That's also true when the project is larger than shades alone. A home may need custom blinds in one room, outdoor drapery at the lanai, drapery repair in a formal dining room, or curtain hemming to bring existing panels back into proportion after flooring changes. Mixed-scope work rewards coordination.
If you're weighing whether to install on your own or bring in help, reviewing custom blinds installation options can clarify where professional service adds the most value.
A well-installed cellular shade should feel effortless for years. That's the standard worth aiming for.
If you'd like a polished result without the trial and error, The Drapery Company provides expert measuring, fabrication, and installation for custom window treatments throughout the Tampa Bay area, including shades, drapery, motorized solutions, and refined residential or commercial finishing work.