

What Is A Traverse Rod And How Does It Elevate Your Windows
February 23, 2026
How To Measure For Valances: A Guide To Achieving A Perfect Fit
February 25, 2026
Installing drapery holdbacks correctly is about more than just drilling a few holes. It's about finding that sweet spot—usually about one-third of the way up from the floor—marking it precisely, and anchoring the hardware securely for your specific wall type. Get this small detail right, and you’ll transform your window treatments from simply functional to a true design statement.
Why Drapery Holdbacks Are A Signature Of Luxury Design

Before we get into the nuts and bolts of installation, it’s worth taking a moment to appreciate why holdbacks are such a key element in high-end interior design. They aren't just an accessory; they are the final touch that unlocks the full aesthetic potential of your draperies.
Properly placed holdbacks act like a sculptor's hands, shaping your drapery into elegant, sweeping folds that you just can't get by pushing the fabric aside. This intentional styling brings a sense of order and grandeur to a room, whether it’s a private home or a sophisticated commercial space.
The A-List Of Aesthetic And Practical Benefits
But the advantages go far beyond looks. By sweeping the fabric away from the glass, holdbacks invite an abundance of natural light to flood the room, instantly making the space feel larger, brighter, and more welcoming while perfectly framing the view outside.
They also play a crucial protective role for your investment. Constant handling of delicate fabrics like silk, velvet, or linen leads to soiling and wear. Holdbacks minimize this contact, preserving the beauty and integrity of your custom draperies for years to come.
By guiding the fabric into a perfect cascade, holdbacks ensure the material drapes as intended, showcasing its texture, pattern, and richness. This small but crucial piece of hardware is what separates standard curtains from truly bespoke window fashion.
Elevating Every Environment
The impact of this finishing touch is universal, creating a polished and cohesive look in any setting. Just think about how they elevate different spaces:
- Residential Spaces: In a grand living room or master suite, holdbacks add a layer of sophistication and formality, turning windows into deliberate focal points.
- Commercial Lounges: For exclusive clubs or high-end hotels, they contribute to an atmosphere of curated luxury and attention to detail that discerning clients notice and appreciate.
- Outdoor Drapery: On a lanai or patio, specially designed outdoor holdbacks manage fabric in the breeze while adding a distinct, resort-like feel to the space.
Knowing how to install drapery holdbacks is about more than just mounting hardware; it’s about executing a core design principle. To see how these components fit into the bigger picture, you can explore the latest drapery hardware trends making a statement with style. A precise, professional installation guarantees this small detail delivers lasting, sophisticated results.
Choosing Holdbacks That Complement Your Drapery
Before you even think about drilling a single hole, the first real step is picking the right holdback. This isn't just a piece of hardware; it’s a finishing touch that can make or break the entire look. The goal is to choose something that feels like a natural extension of your drapery, the rod, and the room itself.
The weight of your fabric is your starting point. Heavy, luxurious velvets or thick blackout drapes demand a substantial holdback with a deep projection—it needs the strength and space to sweep all that fabric aside gracefully. On the other hand, for delicate sheers or breezy linens, a more subtle, delicate piece of hardware is all you need to do the job without overwhelming the window.
Aligning Style With Your Interior Vision
A holdback should speak the same design language as the rest of your space. Picture a sleek downtown condo—clean, minimalist metal posts would fit right in, adding to that sharp, architectural feel. Now, imagine a traditional estate or a classic hotel lobby. Here, you'd expect to see something more ornate, like detailed medallions or elegant U-shaped hooks that add a touch of timeless charm.
Don't forget to look up at the drapery rod. The holdback and rod should feel like a matched set, even if they aren't from the same collection. Simply matching the finish—whether it's brushed nickel, antique brass, or matte black—creates a polished, cohesive look that designers strive for. The style of the drape itself, like the formal structure of what are pinch pleat drapes, also plays a huge role in these hardware decisions.
Material Selection For Lasting Performance
The material you choose is about more than looks; it's about long-term performance and durability, especially when you're dealing with the outdoors.
- For Interior Spaces: You have a world of options. Classic wood, modern acrylic, and a variety of metals are all on the table. The best choice is one that complements the other fixtures and finishes in the room.
- For Outdoor Drapery: In humid or coastal areas, this is non-negotiable. You have to go with rust-resistant materials like stainless steel, powder-coated aluminum, or galvanized metal. Anything else will corrode and fail, ruining both the hardware and potentially the fabric.
Choosing the right holdback is really an investment in both aesthetics and function. It’s a small detail that makes a huge impact, which is why it’s a key part of a thriving and growing market.
The numbers back this up. The global drapery hardware market, which includes these essential pieces, was valued at USD 6.88 billion and is expected to climb to USD 10.15 billion by 2035. That growth is fueled by people just like you, upgrading their homes and commercial spaces. Making sure your hardware is not only beautiful but built to last is the first step toward a professional-quality result. You can dive deeper into the drapery hardware market on businessresearchinsights.com.
Gathering The Right Tools For A Flawless Installation
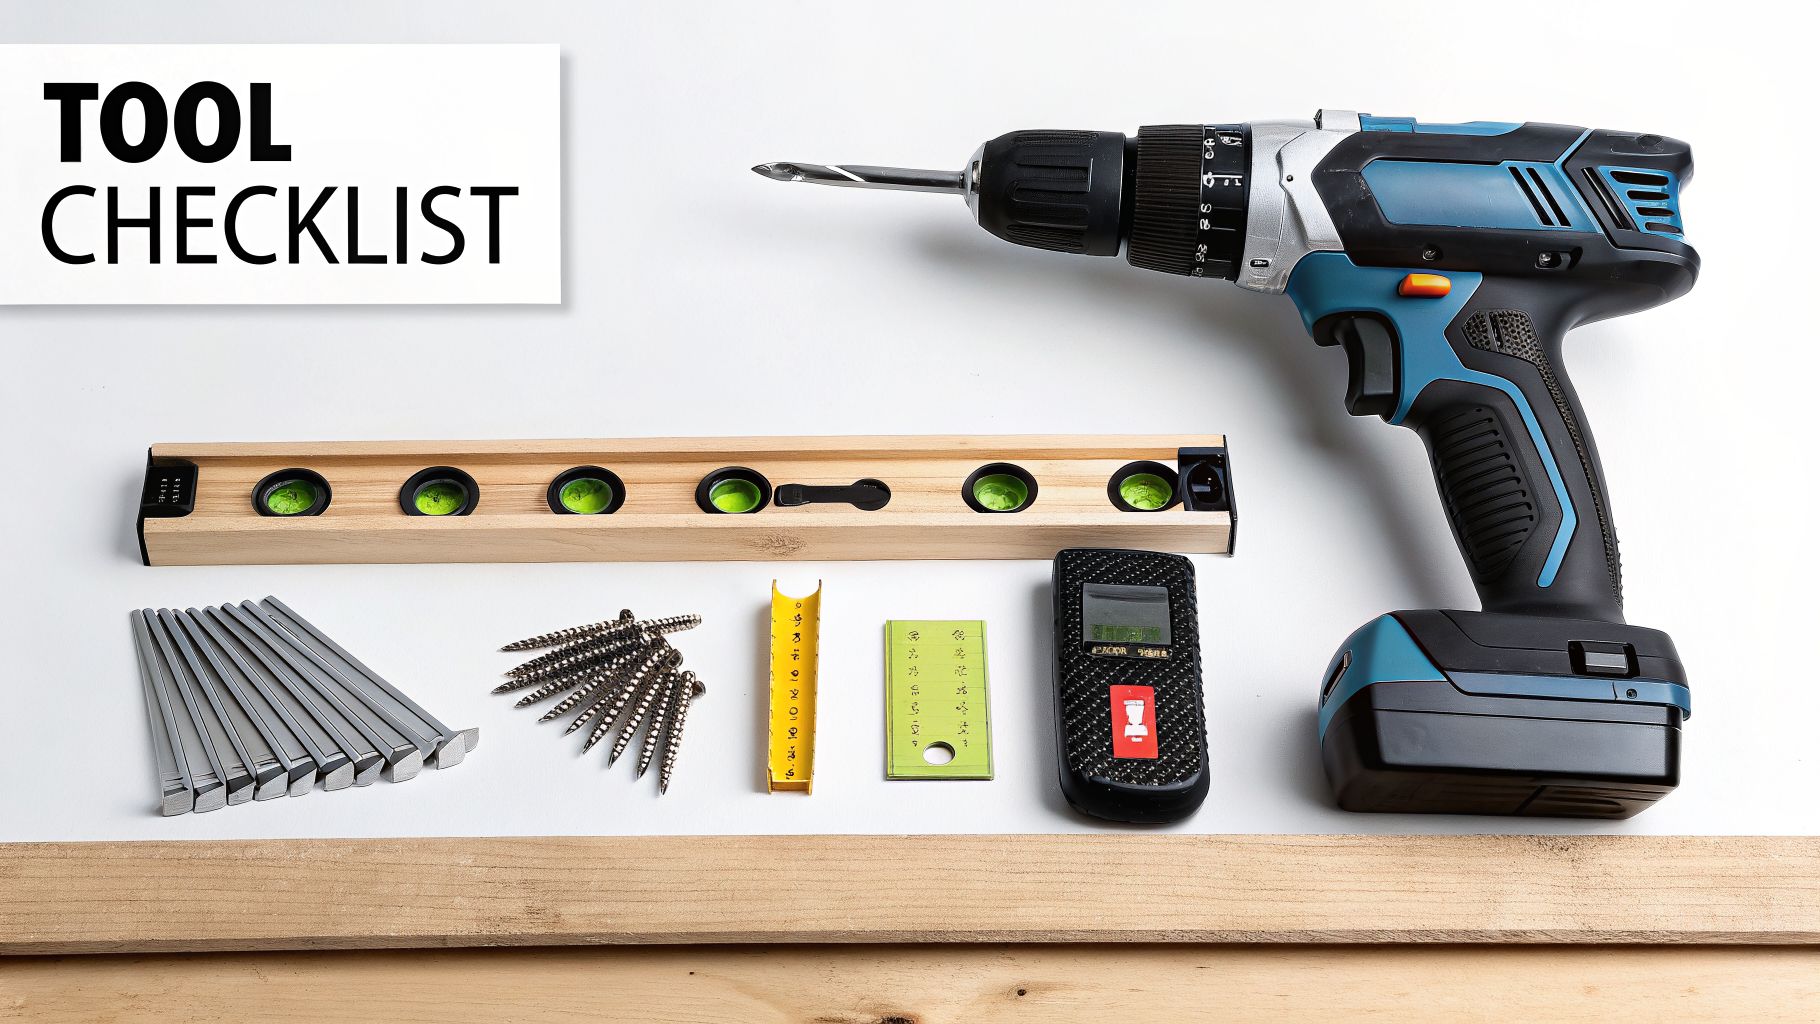
Any professional-quality installation comes down to preparation and precision. It all starts with having the right tools for the job. Getting everything together before you even think about drilling a hole not only makes the process smoother but guarantees your holdbacks will be secure, level, and look like they were installed by a pro.
It’s about more than just a drill and a screwdriver, though. The small details matter. The kind of wall you’re working with completely changes the hardware you'll need. Drilling into solid wood trim, for instance, is a totally different ballgame than mounting on drywall, plaster, or masonry. If you're looking for guidance on the steps leading up to this point, our complete guide on how to hang a curtain has all the background you'll need.
Your Essential Toolkit
To make sure your installation is flawless, pull these items together first. This checklist covers the basics for getting your drapery holdbacks perfectly aligned and securely mounted.
- Measuring Tape: For getting those numbers right every time.
- Pencil: You want fine, clear markings you can easily erase later.
- High-Quality Level: A laser or bubble level is your best friend here—it’s absolutely crucial for ensuring your holdbacks are perfectly aligned.
- Stud Finder: Don't skip this. It's essential for finding the wood studs behind drywall for the strongest possible anchor point.
- Drill and Assorted Bits: Make sure you have the right bits for your wall material, whether it’s wood, masonry, or just standard bits for drywall.
- Screwdriver or Driver Bit: Perfect for tightening screws by hand so you don't overdo it and strip the screw.
- Wall Anchors: Always pick anchors specifically rated for your wall type and strong enough to support the weight of your drapes.
Here's a pro tip that really separates a DIY look from a professional one: before you drill, do a quick test fit. Gently gather the drapery fabric and hold it in the holdback right over your pencil mark. This simple step lets you see exactly how the fabric will drape, allowing for small adjustments to get that perfect, elegant sweep.
And don't forget about safety—it should always be your top priority. Always wear safety glasses to protect your eyes from any dust or debris. It's also a good idea to make sure your work area is clear of trip hazards. A little prep work is the key to achieving a truly luxurious and lasting result.
Mastering Placement For An Elegant Drape
The real artistry in installing drapery holdbacks isn't just about getting them on the wall—it's about where you put them. This single decision completely dictates how the fabric falls, how light filters into the room, and the final impression your windows make.
While there's no single rigid formula, professional designers rely on a few proven principles to get that coveted, graceful sweep of fabric. It all starts with precise measurement. Your goal is perfect symmetry on both sides of the window, creating a look that feels balanced and intentional. This is where a good level is your best friend; even a tiny deviation can make the whole setup look amateur.
The Classic Rule Of Thirds
One of the most trusted guidelines in the design world is the "rule of thirds." For drapery, this means placing the holdback about one-third of the way up from the curtain's hem. This classic placement creates a timeless, elegant drape that just works, whether in a formal living room or a cozy bedroom.
It strikes that perfect balance, so the fabric doesn't look too cinched-in or awkwardly low. You get a natural, pleasing cascade that really shows off the texture and flow of the material. For standard eight-foot ceilings, this usually puts the holdback around 32 inches from the floor, but always measure your specific drapery panels to be sure.
Exploring Alternative Placements
The rule of thirds is a fantastic starting point, but sometimes the room—or your personal style—calls for a different approach. The window's architecture and your design goals should always be the final authority.
Here are a few other strategies to consider for a more custom look:
- A Higher Placement: If you're going for a touch of drama and formality, try positioning the holdback slightly higher than the one-third mark. This gathers the fabric more tightly, creating a longer, more pronounced vertical line that can make your ceilings feel even taller.
- Aligning With Architecture: A more traditional method is to align the holdback with a key architectural feature, like the bottom of the windowsill or the meeting rail on a double-hung window. This creates a visually grounded and cohesive look that feels very intentional.
- Custom Heights for Unique Windows: Unconventional window shapes, like arches or custom-built openings, often demand a more intuitive eye. Our guide on how to hang drapes on arched windows offers specialized tips for these tricky situations.
It's no surprise that 70% of professionals recommend placing holdbacks at roughly one-third of the window's height to achieve that balanced, effortless look. This sweet spot also helps prevent fabric sag, which can compromise material efficiency by up to 20%. It’s also worth noting that for commercial projects, especially in places like Florida, regulations around sustainable materials are becoming more common, making professional guidance a smart investment. You can dive deeper into the latest window covering market trends.
Pro Tip: Before you drill any holes, use a small piece of painter's tape to mark your chosen spot. Step back, look at it from across the room, and see how you feel about it. This little step can save you a lot of patching later.
Finally, let's talk about how far out from the window to place them. A good rule of thumb is to position the holdback 3 to 6 inches out from the side of the window frame. This gives the gathered fabric enough room to rest when the drapes are open, letting in the maximum amount of natural light and ensuring your view is beautifully framed, not blocked.
Alright, you've got your tools, you've picked the perfect spot—now comes the moment of truth. How you anchor your holdbacks is what separates a professional, lasting installation from one that will pull out of the wall in a few months. The surface you're drilling into is everything; it dictates the hardware you need and the technique you'll use.
Let's start with drywall, the most common surface you'll encounter. Your best friend here is a stud finder. Seriously, don't skip this. If you can locate a solid wood stud right behind your mark, you've hit the jackpot. Driving a screw directly into a stud gives you an incredibly strong anchor point, more than enough to handle even the heaviest, most luxurious velvet drapes.
But what if there's no stud where you need to drill? It happens all the time. This is where you absolutely must use a wall anchor. Just putting a screw into that hollow drywall is asking for trouble. It will sag, pull out, and leave you with a damaged wall. And not just any anchor will do. For heavier curtains, you need something robust like a toggle bolt or a snap-toggle. These create a seriously secure hold that won’t budge.
If you're still deciding on the exact placement, this decision tree can help you visualize how different heights and widths create different stylistic effects.
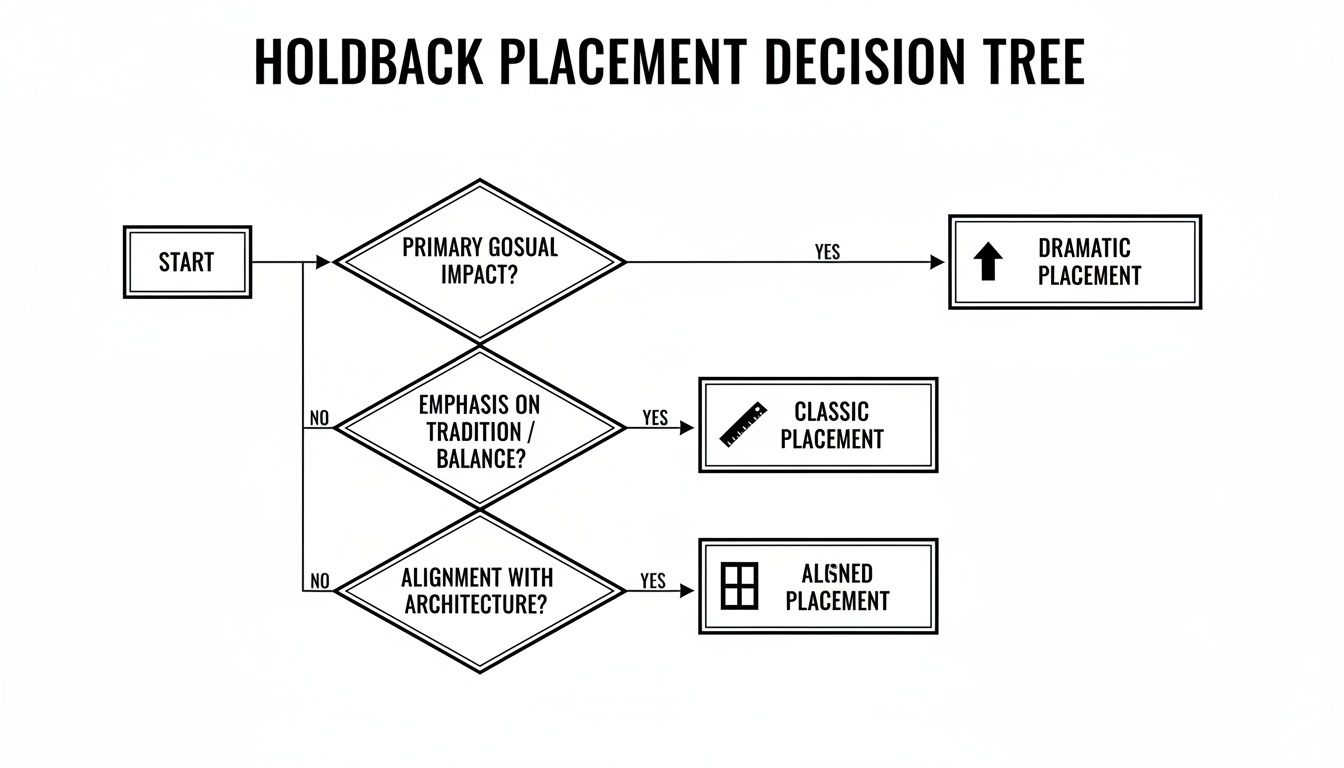
As you can see, aligning your choice with a dramatic, classic, or aligned look helps nail down the final placement for a perfectly tailored result.
Tackling Tricky Surfaces
Once you move beyond standard drywall, things get a little more specialized. Different materials demand a unique approach to avoid causing damage while ensuring a rock-solid installation.
Plaster Walls: Common in older, historic homes, plaster is notoriously brittle and loves to crack. The secret is patience. Start with a small pilot hole, drilling slowly and carefully, then step up to the final bit size. A great pro-tip is to put a piece of painter’s tape over your mark before drilling—it helps prevent the plaster from chipping as the bit goes in.
Wood Trim: Mounting directly onto solid wood window casings or trim is fantastic because it provides an incredibly strong foundation. But here's the crucial step you can't miss: always pre-drill a pilot hole before you drive the screw. It only takes a second, but it prevents the wood from splitting and preserves the beauty of your millwork.
Brick or Concrete: For these tough masonry surfaces, your standard drill just isn't going to cut it. You'll need to step up to a hammer drill and grab some specialized masonry bits. When you pair those with the right masonry anchors or concrete screws, you create a mount that’s bomb-proof—perfect for large-scale commercial jobs or grand residential projects.
Here's an insider tip I use on every job, no matter the wall material: wrap a small piece of painter's tape around your drill bit to mark the right depth for the anchor. This simple trick stops you from accidentally drilling too deep into the wall.
Why Professional Installation Is A Smart Investment
Getting the anchoring right isn't just about looks; it's a matter of safety and protecting your investment. For commercial properties and multi-family buildings, safety is non-negotiable. Using rigid, high-quality hardware ensures compliance with safety standards, which have been shown to prevent accidents in 90% of cases.
Beyond safety, a professional installation adds real value. Industry data shows that well-executed, high-quality window treatments can boost a property's resale value by 10-15%. It’s an investment that pays for itself.
With the right technique for your specific wall type, a secure, damage-free installation is totally achievable. But if you’re staring at a challenging surface or working with high-end draperies, calling in an expert is always the smart move. You can learn more about what we do by exploring our guide to drapery installation near me.
Tackling Common Holdback Installation Questions
Even the most straightforward drapery project can throw you a curveball. When you're in the final stages of installing holdbacks, little questions can pop up that make you second-guess your plan. Getting these final details right is what separates a good-looking installation from a truly professional one.
From nailing the placement to dealing with tricky walls, let's walk through some of the most common questions we get from homeowners. Think of this as your go-to guide for troubleshooting on the fly so you can finish the job with confidence.
How Far From The Window Frame Should I Install Holdbacks?
Finding the sweet spot for your holdbacks is a classic balancing act between looks and function. You want to frame the window beautifully and let in as much natural light as possible.
A great starting point is to place the holdback 3 to 6 inches out from the side of the window frame. This gives the gathered fabric enough room to rest without creeping over the glass. If you're working with particularly bulky drapes—think heavy, luxurious velvet—you might need to push that measurement a little wider to handle the volume.
Here's a pro tip: Before you even think about drilling, do a quick visual check. Gather the curtain panel in your hand and pull it back to where you've made your pencil mark. This simple move shows you exactly how the fabric will hang, letting you make small tweaks for that perfect, graceful sweep.
This little test ensures the final result is exactly what you pictured, creating that elegant cascade of fabric that really elevates the window.
What If My Wall Is Hollow And There’s No Stud?
Don't panic—running into hollow drywall right where you need to install something is a rite of passage for any home project. It's an incredibly common scenario.
If your stud finder comes up empty, you absolutely must use a drywall anchor. Driving a screw directly into hollow drywall is just asking for trouble, especially for something that will hold the weight of your drapes. It will eventually tear out, damaging your wall and letting your curtains sag. The anchor you choose really depends on the weight of your window treatments.
- For Heavier Drapes: A toggle bolt or a snap-toggle anchor is your best bet. These are the heavyweights of the anchor world, providing a super-secure hold by bracing against the back of the drywall.
- For Lighter Curtains: For breezy fabrics like sheers or simple unlined cotton, a threaded drywall anchor can often do the job just fine.
Always double-check the anchor's weight rating on the package. You want to be sure it can comfortably support your specific drapes for a secure, long-lasting installation.
Can I Install Holdbacks For Outdoor Drapery?
You certainly can, and it's a fantastic way to add a sophisticated, resort-like vibe to your outdoor living spaces. The key to success here, however, is all about choosing the right materials to stand up to the elements.
When you're installing holdbacks on a patio, lanai, or pergola—especially in a humid climate—you have to use rust-proof materials. Look for options made from high-grade stainless steel, powder-coated aluminum, or galvanized metal. These are engineered to handle constant exposure to moisture and sun without corroding or, even worse, leaving rust stains on your beautiful outdoor fabrics.
And don't forget the hardware! Make sure your screws and anchors are also rated for exterior use to create a completely weather-resistant setup.
For any custom drapery project, from selecting the perfect fabric to flawless installation, the experts at The Drapery Company are here to bring your vision to life. Discover our bespoke window treatment solutions.


