
Difference Between Brushed Nickel and Satin Nickel Explained
June 15, 2026
Motorized Sun Shades for Patio: Ultimate Guide 2026
June 17, 2026
A Shutter Usually Doesn't Announce A Big Problem. It Starts Small. One Louver Sits Slightly Crooked. A Panel No Longer Closes With That Crisp, Quiet Pull. The Tilt Rod Feels Loose In A Room That Otherwise Looks Polished And Complete.
In A Well-Finished Home, Those Small Faults Stand Out Fast. Plantation Shutters Are Meant To Look Orderly, Balanced, And Intentional. When One Part Stops Doing Its Job, The Entire Window Starts Looking Less Custom And More Compromised.
That's Why It Helps To Understand Plantation Shutters Parts. Not So You Can Turn Every Homeowner Into A Repair Technician, But So You Can Recognize What You're Looking At, Describe Problems Accurately, And Decide Whether A Repair Is Sensible Or A Short-Term Patch. In Tampa Bay, That Knowledge Matters Even More. Humidity, Sun Exposure, And Daily Use Put Real Stress On Fine Window Treatments, Especially In Rooms With Large Glass Areas, Coastal Air, Or Strong Afternoon Heat.
The Enduring Appeal Of Perfectly Functioning Shutters
A Beautiful Shutter Should Disappear Into The Room. You Notice The Light Filtering Through It, The Privacy It Gives You, And The Finished Architecture Around The Window. You should not be distracted by a slat that drifts open every time the air conditioning kicks on.
That drifting louver is usually where the conversation starts. A homeowner calls because one blade won't stay aligned, or a panel has started rubbing at the frame. What sounds minor often reveals something more specific underneath. A worn connector, a loose adjustment point, a panel that has shifted slightly, or material movement that's beginning to affect the whole shutter.
The important part is this. Shutters were never just decorative trim. Their mechanics come from a long functional history. Parts like louvers, rails, and stiles evolved from earlier shutter designs built to manage light, weather, and privacy, with roots traced back to ancient Greece and a later decorative shift by the 1920s, as outlined in this history of plantation shutters. That history still explains why modern shutters are built the way they are.
Why Homeowners Benefit From Knowing The Parts
You don't need trade jargon for the sake of jargon. You need the right words because they change the quality of the decision.
When a homeowner says, “one of the slats is loose,” that could mean a louver issue, a tilt connection issue, or a tension problem inside the stile. Those are different repairs with different outcomes.
Practical Rule: If You Can Name The Part, You Can Usually Narrow Down Whether The Issue Is Cosmetic, Mechanical, Or Structural.
That distinction matters in higher-end interiors. It also matters in commercial spaces, hospitality settings, and country club environments where shutters are part of the finish level of the room. The same is true with soft treatments. A hem that has dropped on drapery, a damaged return on a curtain panel, or outdoor drapery hardware that has loosened from exposure all affect the room in ways clients notice immediately.
Tampa Bay Changes The Conversation
In This Climate, Small Problems Don't Always Stay Small.
Moisture movement, heat, and repeated expansion and contraction can turn a loose part into recurring misalignment. That's why the best approach isn't just identifying plantation shutters parts. It's knowing which issues are isolated and which ones signal that the panel itself is no longer stable.
The Core Anatomy Of A Plantation Shutter
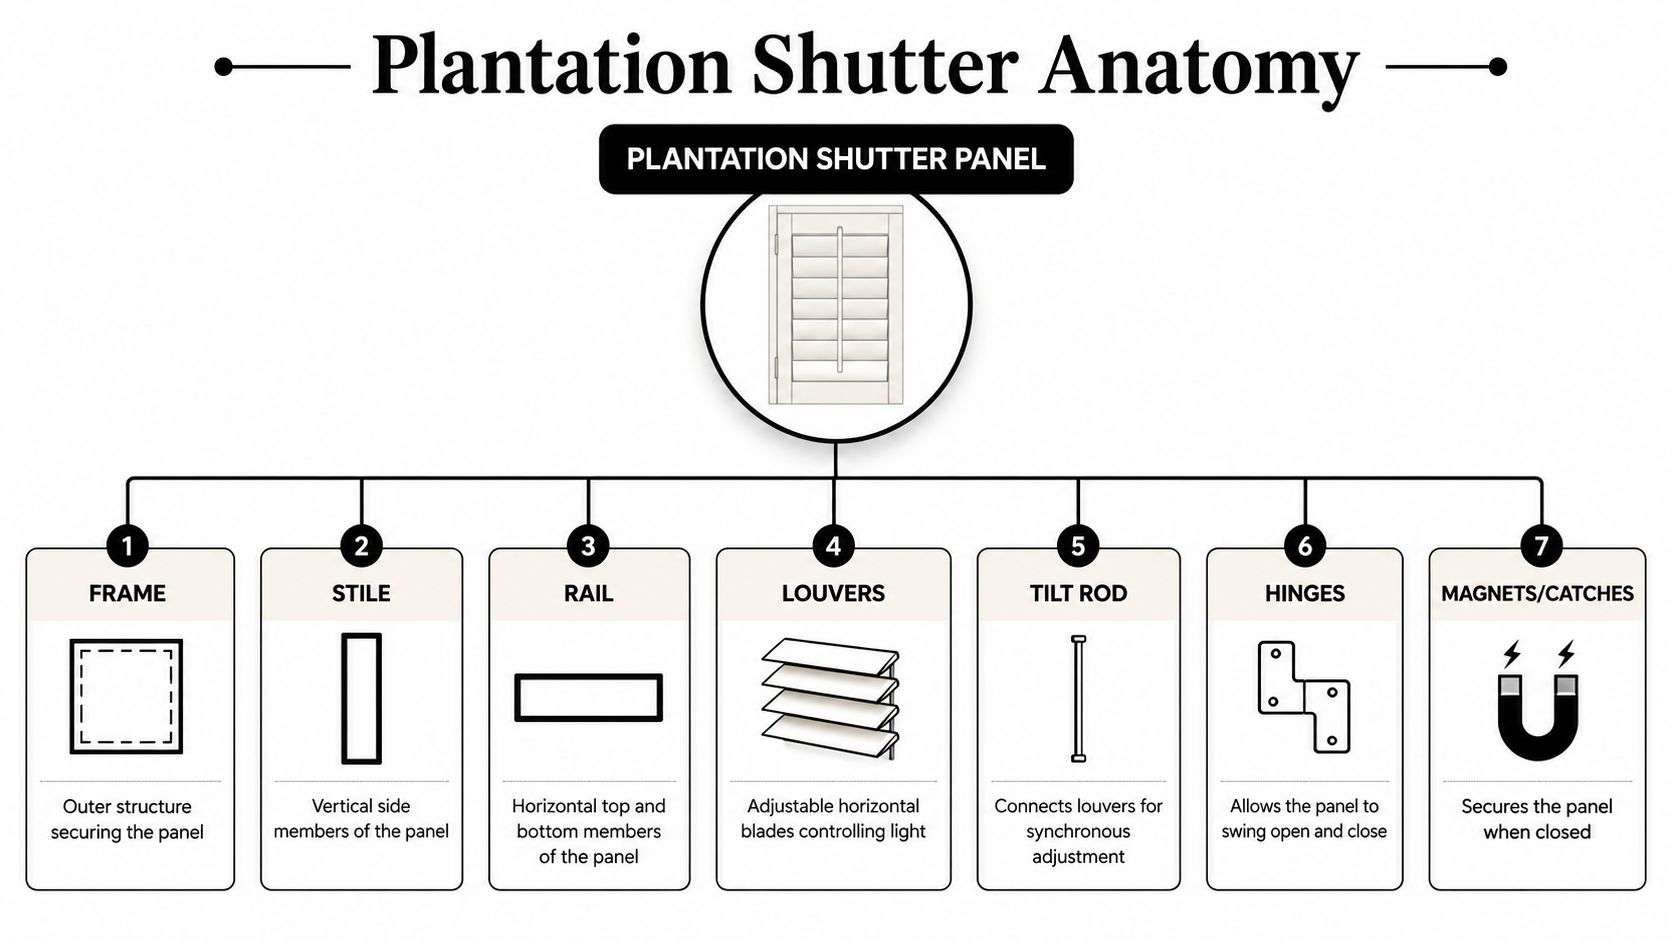
A Plantation Shutter Is A Mechanical Assembly, Not A Single Piece Of Millwork. The clean look can fool people into thinking it's simple. It isn't. Every part has a job, and the panel only performs well when those parts stay in alignment.
Here's the anatomy at a glance.
The Structural Frame
Think of the shutter panel as a built system with a skeleton and moving components.
The frame anchors the shutter to the window opening. Inside that assembly, the stiles are the vertical side members, and the rails are the horizontal members at the top and bottom. Together, they create the rigid shape that keeps the panel square.
If the stiles and rails are well made and properly fitted, the shutter opens and closes with consistency. If they're weak, out of square, or stressed by moisture, every moving part starts suffering.
The Working Components
Inside that structure are the parts homeowners interact with every day.
The louvers are the horizontal blades that control light, privacy, and airflow. The tilt rod or push rod coordinates their movement so they open and close together. Hinges allow the panel to swing, and magnets or catches keep it seated when closed.
A useful detail for buyers is louver size. Plantation shutters commonly use louvers in the 2.5- To 4.5-Inch range, which gives a broader view-through and stronger airflow than narrower traditional blades, according to this overview of parts of a plantation shutter.
How These Parts Work Together
When one part weakens, the others compensate until they can't.
A loose hinge can make a sound panel feel warped. A failed tilt connection can make solid louvers look broken. An out-of-square frame can create the impression that the whole shutter is failing when the issue started with alignment.
That's why style should never be separated from construction. Homeowners comparing layouts and panel configurations often benefit from looking at different plantation shutter styles first, then asking how each style affects cleaning, panel weight, sightlines, and long-term serviceability.
A Good Shutter Doesn't Just Match The Room. It Moves Smoothly, Holds Position, And Stays Quiet Over Time.
The Parts Most People Misidentify
A Few Terms Get Mixed Up Constantly:
- Frame: The Outer Structure Mounted To The Window Opening
- Stiles: The Vertical Side Members Of The Panel
- Rails: The Horizontal Members Holding The Panel Together
- Louvers: The Adjustable Slats
- Tilt Rod: The Visible Or Concealed Mechanism That Synchronizes Louver Movement
Once you can separate those visually, diagnosing wear becomes much easier.
Understanding Shutter Tilt Mechanisms And Frames
Most Homeowners Notice The Louvers First. Installers Notice The Tilt System And The Frame. Those two choices affect how the shutter looks, how it cleans, and how it behaves after years of use.
Traditional Tilt Rod Versus Hidden Tilt
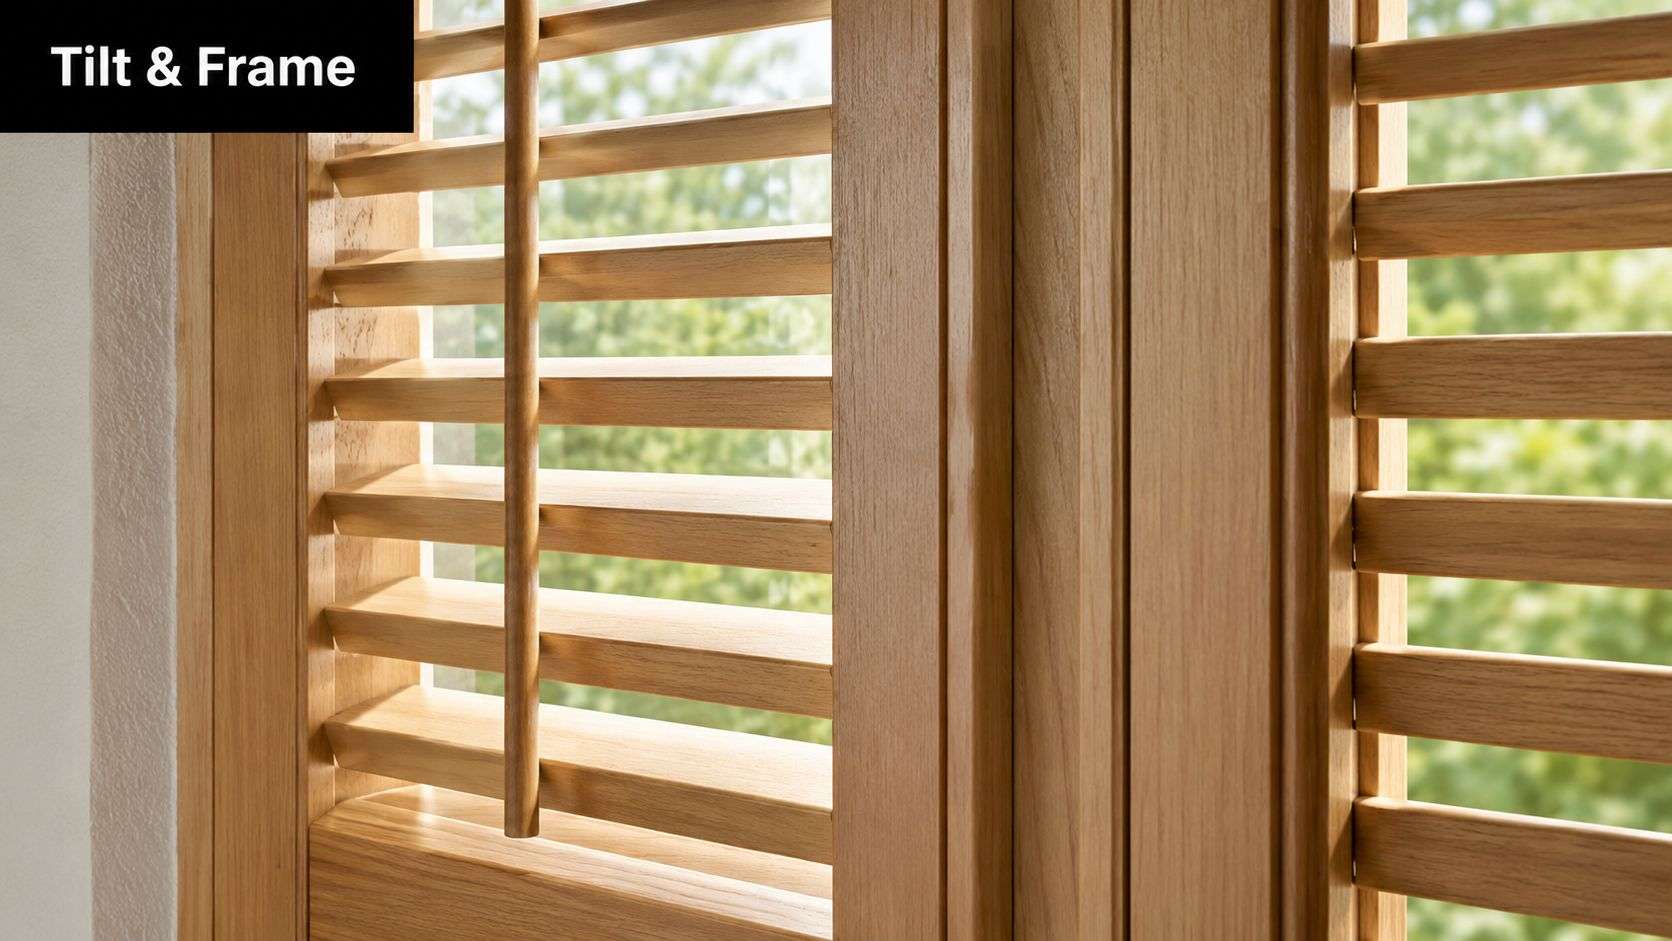
A traditional tilt rod runs vertically across the front of the panel and connects the louvers visibly. It has a classic look and makes the shutter's mechanics easy to understand. It also makes part identification simpler when service is needed.
A hidden tilt or rear push system keeps the front cleaner. Many homeowners prefer it because the face of the shutter looks less interrupted. It can also make routine dusting a little easier.
The trade-off is straightforward:
- Traditional Tilt Rod: Easier To Read Visually, More Traditional In Appearance, Straightforward For Some Repairs
- Hidden Tilt: Cleaner Sightline, More Contemporary Look, Less Visible Hardware On The Face
Neither option is automatically better. The right one depends on the room, the architecture, and how particular you are about visible hardware. The same kind of finish sensitivity applies to decorative hardware in other parts of the home too. If you've ever compared subtle metal tones, the distinction between brushed nickel and satin nickel gives you a good sense of how small design choices can change the final impression.
Frame Styles Change The Finished Look
The frame does more than hold the shutter in place. It shapes the visual transition between the shutter and the window casing.
An L-Frame usually gives a cleaner, simpler edge. A Z-Frame can help cover slight irregularities where the casing or opening needs a more integrated fit. A Deco Frame introduces a more pronounced decorative profile, which can suit traditional interiors, formal rooms, and homes with layered millwork.
If The Window Opening Is Imperfect, The Frame Choice Matters As Much As The Panel Choice.
What Works In Practice
For modern interiors with wide openings and clean trim, hidden tilt often looks more refined. In historic homes or rooms with more traditional millwork, a visible tilt rod can feel more appropriate and less forced.
The frame should never be selected by profile alone. It has to work with the actual opening. In the field, that's where many disappointing shutter jobs begin. The panel may be attractive, but if the frame style doesn't suit the casing depth or wall condition, the installation will always look slightly off.
Essential Structural And Finishing Components
The Smaller Parts In A Shutter Often Decide Whether It Feels Premium Or Problematic. Homeowners tend to focus on louvers and color. Installers pay close attention to reinforcement, hardware placement, and adjustment points because that's where longevity lives.
Divider Rails Are Not Optional On Tall Panels
One Of The Most Important Structural Rules In Shutter Fabrication Concerns panel height. For structural integrity, a divider rail is mandatory on shutter panels exceeding 66 inches in height, because the weight and torque of the louvers can bow the vertical stiles without that reinforcement. The same technical guidance specifies that panels from 66 to 90 inches require one divider rail, while panels from 90 1/8 to 120 inches require two divider rails, as shown in this shutter technical guide from Levolor.
That isn't a decorative preference. It's a structural necessity. In humid environments like Tampa Bay, material movement only makes that reinforcement more important.
The Hardware That Keeps A Panel Honest
Several supporting parts do quiet, constant work:
- Hinges: They control the swing, spacing, and feel of the panel.
- Magnets And Catches: They hold the shutter shut so the panel doesn't drift open.
- Assembly Hole Plugs: These keep the finish neat after construction and installation access points are closed.
- Mounting Hardware: This determines how securely the frame stays anchored to the opening.
For readers comparing replacement pieces or trying to understand compatibility, it can help to see examples of shutter hardware for louvered blinds because it shows the sort of hardware families and mechanical kits these systems depend on, even when exact brand matching still requires caution.
The Overlooked Adjustment Points
A Fine Shutter Should Hold Its Position Without Looking Stiff.
Inside the panel, small adjustments make that possible. Tension points and properly set hardware prevent louvers from feeling floppy, noisy, or inconsistent from one panel to the next. These are the details lower-cost products often get wrong. They may look acceptable on installation day and then feel loose after regular use.
That's also why maintenance matters. Regular dusting and careful wipe-downs reduce the grime that settles around moving components and hinge areas. If you want a practical routine for that, this guide on how to clean plantation shutters is useful because it focuses on preserving finish quality instead of just making the shutters look temporarily cleaner.
The Difference Between “Still Working” And “Working Properly” Usually Comes Down To Hardware, Reinforcement, And Fit.
Common Plantation Shutter Failure Modes And Causes
Most Shutter Problems Follow Patterns. Once You Know The Symptom, You Can Usually Narrow The Cause Quickly. That doesn't mean every repair is simple, but it does mean the part at fault is often more predictable than homeowners expect.
When Louvers Move On Their Own
If A Louver Won't Stay Where You Put It, The Problem Often Isn't The Blade Itself. The precise rotation of louvers depends on nylon pivot pins and adjustable tension screws within the stiles, and a common failure called looper flutter happens when that tension is lost, as explained in this review of plantation shutter panel parts.
This is one of the few issues that may be minor if caught early. If tension adjustment solves it, the panel may still have a long service life ahead.
When A Louver Disconnects Or Sits Crooked
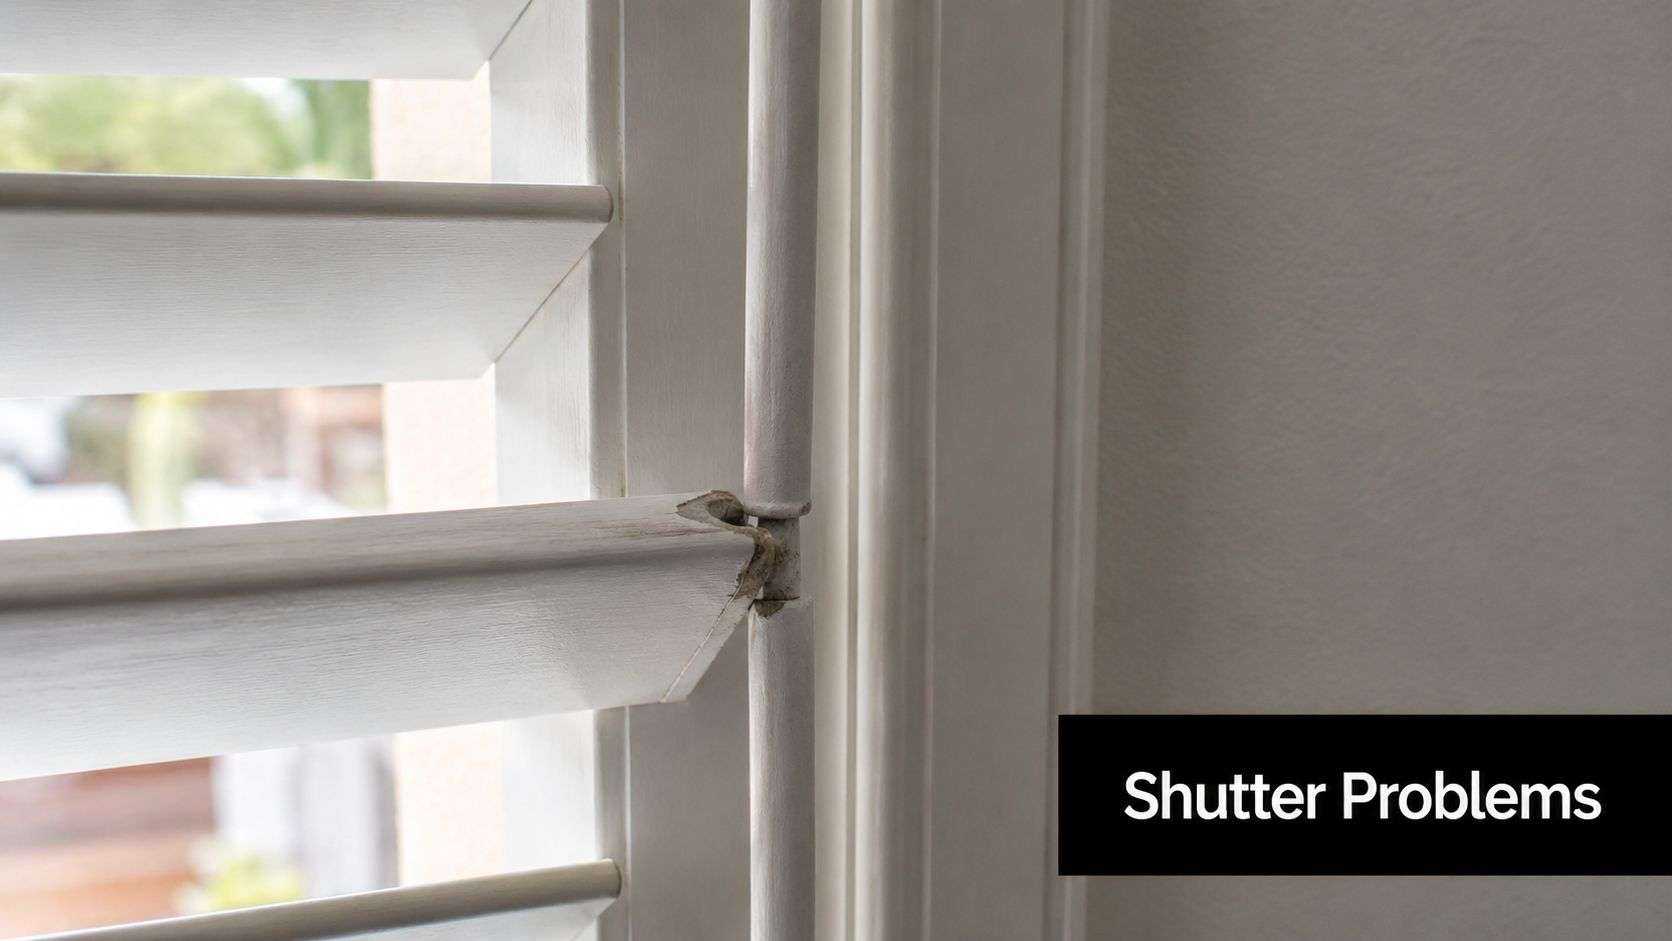
A Crooked Or Detached Louver Usually Points To A Failed Connector, Pin, Or Tilt Attachment.
Common causes include wear from daily operation, impact during cleaning, or stress caused by a panel that's no longer holding alignment properly. In homes with strong sun exposure, repeated heat cycling can make brittle components fail sooner. In more humid rooms, material movement can force parts to work under slight tension until something gives way.
When The Panel Won't Close Cleanly
If A Panel Rubs, Sticks, Or Refuses To Catch, Look Beyond The Magnet First.
The culprit could be hinge shift, frame movement, or slight swelling that changes how the panel lands against the frame. A magnet may only be the final point where the failure becomes visible. This is common in coastal and storm-conscious homes where windows and openings already work hard against moisture and weather conditions. Homeowners thinking about broader exterior protection often compare these issues alongside hurricane-proof window shutters in Tampa Bay, since the opening itself affects long-term performance.
Practical Symptom Guide
- Louvers Drift Open: Check Tension Before Assuming The Whole Panel Is Bad
- One Louver Hangs Out Of Line: Suspect A Pin Or Connection Failure
- Panel Pops Open After Closing: Inspect Alignment, Then Magnet Position
- Repeated Binding: Look For Material Movement Or A Frame Issue, Not Just Surface Hardware
A Single Failure Is Often Repairable. A Pattern Of Similar Failures Usually Means The Panel Is Telling You Something Larger.
The Expert Guide To Repair Versus Replacement
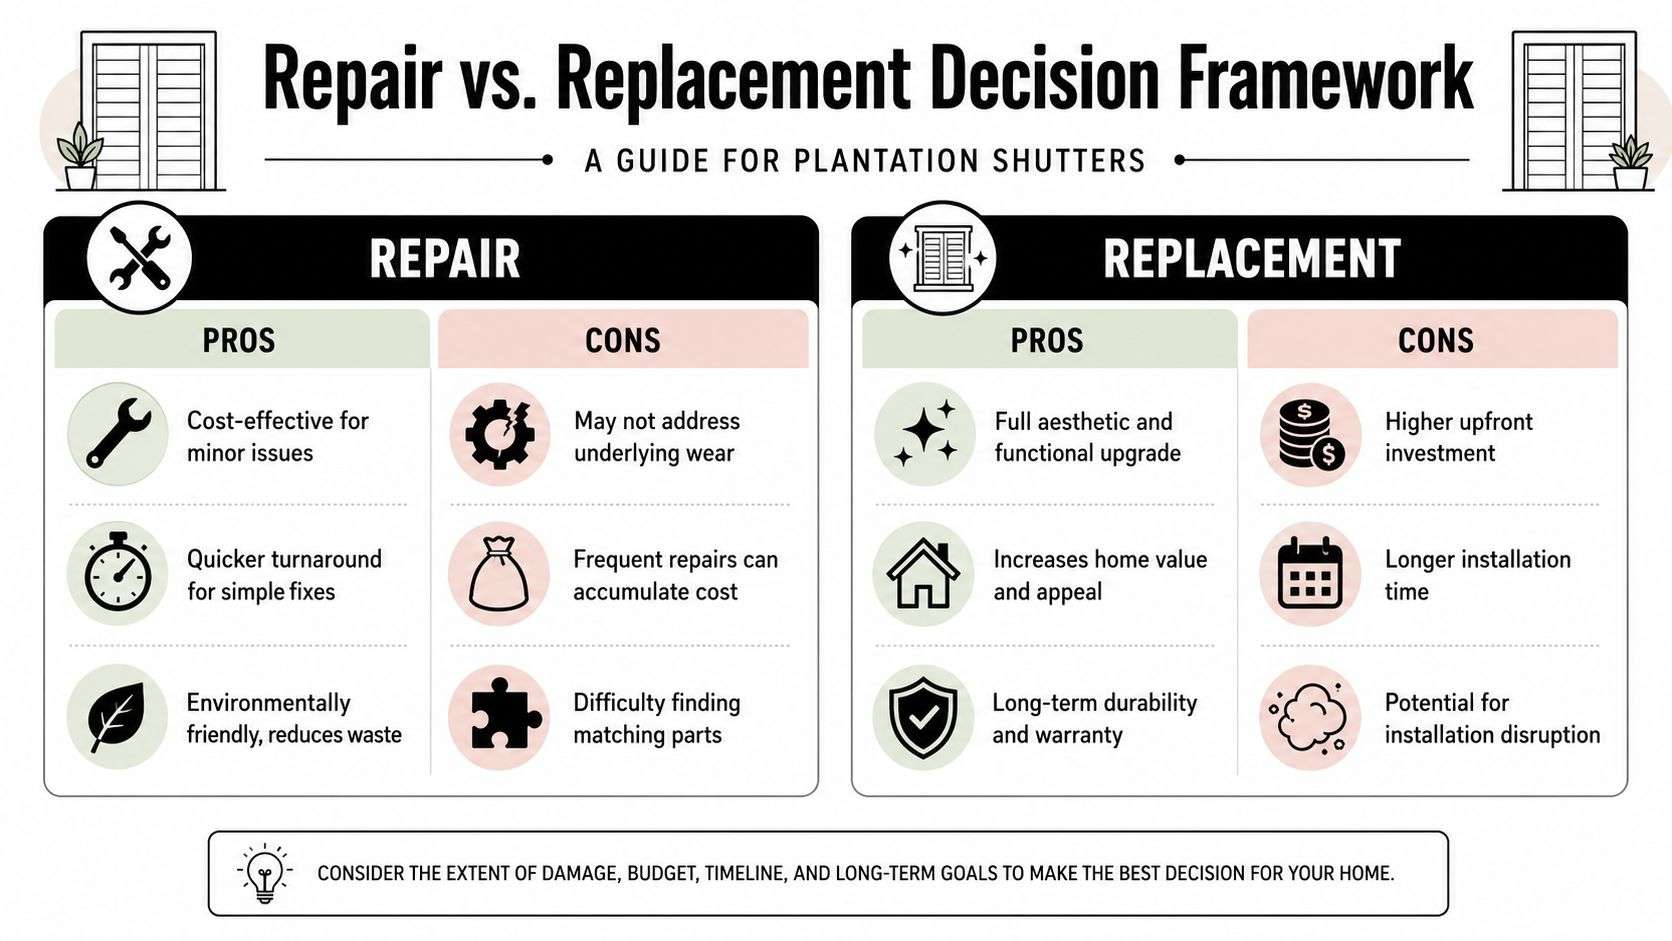
This Is The Decision Most Homeowners Need Help With. Identifying plantation shutters parts is useful, but the better question is whether replacing that part makes practical sense.
Repair Makes Sense When The Failure Is Isolated
A Repair Is Usually Worth Pursuing When One Part Has Clearly Failed And The Rest Of The Panel Is Stable.
That includes issues like a single pin, a magnet, a catch, or a limited adjustment problem. These are localized failures. The shutter still sits square, the finish still matches, and there's no sign that the problem keeps returning after correction.
This is similar to larger house decisions. Homeowners weighing broader opening issues often benefit from a framework like this guide to window decisions for homes because the logic is the same. Repair what is still sound. Replace what is no longer stable enough to justify repeated intervention.
Replacement Is Smarter When The Problem Repeats
The More Important Warning Sign Isn't One Broken Part. It's Recurrence.
DIY fixes exist for minor items like pins or magnets, but recurring failures often point to a systemic issue with fit or fabrication, especially in humid climates where warping makes small hardware problems persistent, as noted in this article on fixing broken shutter parts. If the panel keeps falling out of alignment, if multiple louvers are failing, or if the stile has started moving enough to affect operation across the panel, repair becomes a delaying tactic.
A Practical Decision Filter
Use this lens when you evaluate a shutter:
- Repair It: The issue is singular, the panel is square, and matching parts are available.
- Pause Before Repairing: The part can be replaced, but the shutter already shows subtle rubbing, misalignment, or repeated loosening.
- Replace The Panel: Several parts are failing together, the finish no longer matches, or the structure has visibly shifted.
- Replace The Set: The shutters were low quality to begin with, or multiple openings now show the same pattern.
One practical local option for homeowners who need that kind of assessment is The Drapery Company, which provides shutter evaluation and related window treatment services in the Tampa Bay area, including adjacent needs such as drapery repair, curtain repair, curtain hemming, drapery hemming, and outdoor drapery solutions when a room's overall window treatment plan needs attention rather than a single isolated fix.
If The Repair Doesn't Restore Confidence In The Shutter, It Wasn't The Right Repair.
What Usually Doesn't Work
Patching A Chronic Problem Without Addressing The Underlying Cause Usually Wastes Time.
That includes replacing the same type of connector repeatedly, forcing a swollen panel back into operation, or trying to disguise frame shift with hardware adjustment alone. A clean repair should leave the shutter operating normally, not merely looking better from across the room.
Sourcing Parts And Professional Service In Tampa Bay
Finding The Right Replacement Part Sounds Easier Than It Is. In Practice, matching a shutter part means matching profile, finish, size, connection method, and often the original manufacturer's system. Even when homeowners can identify the failed piece, getting the correct version is another matter.
Why Parts Matching Gets Complicated Fast
A Tilt Rod Isn't Just A Tilt Rod. A Louver Pin Isn't Just A Pin.
Small differences in color tone, blade profile, stile depth, and hardware placement can make an off-the-shelf substitute look wrong or fail early. That's especially true when the shutters are older, custom-painted, or made under a product line that has since changed.
For higher-end homes and commercial interiors, visual mismatch is reason enough to slow down. A repaired shutter should not draw the eye.
Professional Evaluation Saves Time
A Good Service Visit Should Answer Three Questions Quickly:
- Is The Panel Structurally Sound
- Can The Failed Part Be Matched Properly
- Will The Repair Hold In Tampa Bay Conditions
If the answer to any of those is no, replacement usually becomes the cleaner decision. If the answer is yes, a targeted repair can preserve the original installation and avoid unnecessary disruption.
That same judgment applies across window treatments. A damaged hem on custom drapery may be worth repairing. A sun-damaged lining that has begun failing across multiple panels may not be. Outdoor drapery presents the same challenge because exposure changes the life expectancy of fabric, hardware, and stitching.
A Clear Local Next Step
Homeowners who want in-person guidance often start by looking for drapery services near me, especially when the home has a mix of shutters, draperies, sheers, or motorized treatments and the problem may not be limited to one product category.
The right service partner should be able to assess the shutter itself, the surrounding opening, and the rest of the room's treatments with the same level of care. That leads to better decisions, cleaner repairs, and replacements that fit the architecture instead of merely filling the opening.
If Your Shutters Are Binding, Drifting, Misaligned, Or No Longer Looking As Refined As The Rest Of Your Home, The Drapery Company can help you sort out whether a part-level repair is worthwhile or whether replacement is the better long-term investment. We also assist with coordinated window treatment needs, including drapery repair, curtain repair, hemming, and outdoor drapery for residential and commercial spaces throughout Tampa Bay.